Posted on 03 Apr 2017
In our last Digital Insights blog we discussed how to see if a user completed an action by using a "thank you" page which appeared after they submitted a form.
But what if your website doesn't have forms or any kind of "thank you" page? Or, what if you want to record when someone clicks on links that take them away from your website?
This can be done by 'firing events' in Google Analytics containing a label, action and a category.
What is an Event?
An Event is an interaction with your website that is triggered by some kind of user interaction. They can be set up to run on link and button clicks, page scroll and even on just viewing a page.
This information is then stored in Analytics under the "Behaviour -> Events" section.
How do you set up an Event?
The easiest way to create and manage events is by creating a Google Tag Manager account and adding it to your site. This can be done in a similar way to how you added Google Analytics, (if you haven't already done this, you will need to in order to be able to attempt any of this).
You don't have to use Tag Manager to record events but it allows you to make modifications and test without having to adjust your website's code.
For the purposes of this blog I am going to talk you through how to set up an event that fires when someone clicks on a link that leads to another website. This can help identify if a link is getting clicks or if people are just leaving the website.
Once Tag Manager is installed on your website, navigate to your overview page.You should see a blank workspace and on the left, a list of items including Tags, Triggers and Variables.
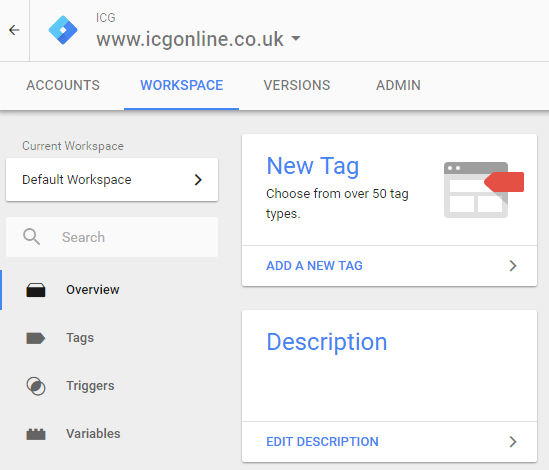
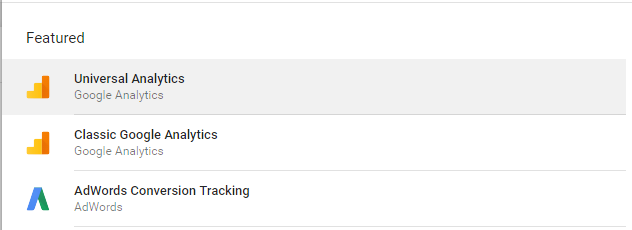
Click on Tags and select the "New" button, this will start the process of creating a brand new tag.
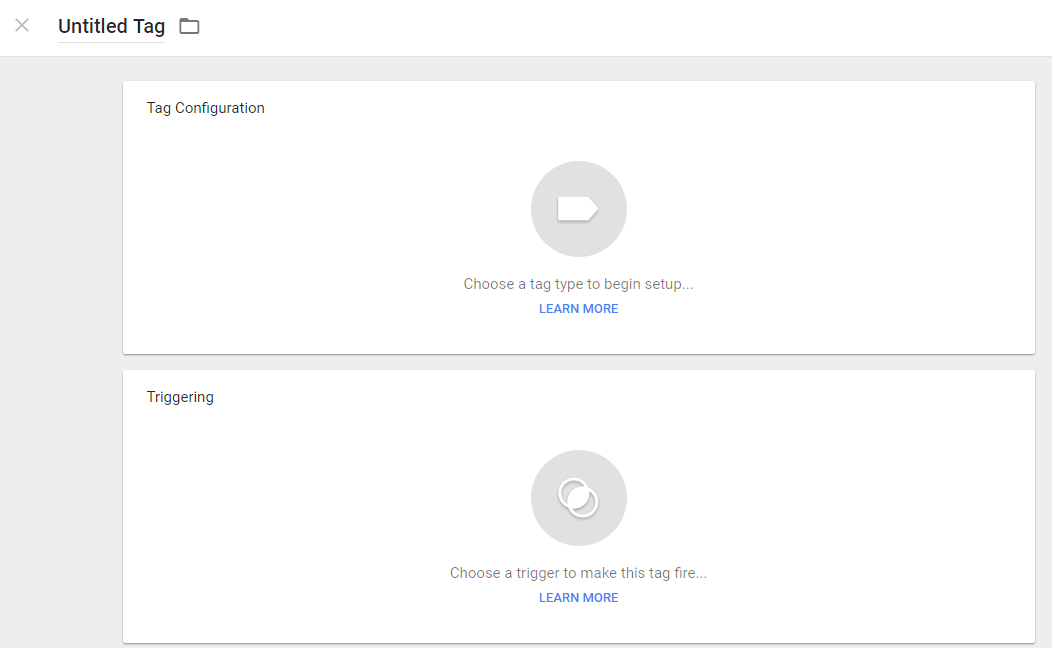
Give your Tag a name and then click on 'tag configuration'. A menu will pop out from the right hand side showing lots of options, this gives you some idea of the usefulness of Tag Manager.
For now I am selecting Universal Analytics, this will give us access to the values that Analytics records.
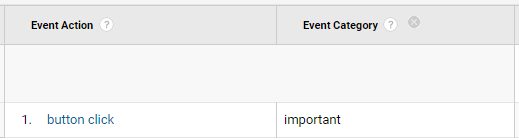
Enter your Google Analytics ID into the Tracking ID section and select the Track Type "Event". I recommend filling out the category and action with information that makes sense at a glance, you can always look into it further within Analytics.
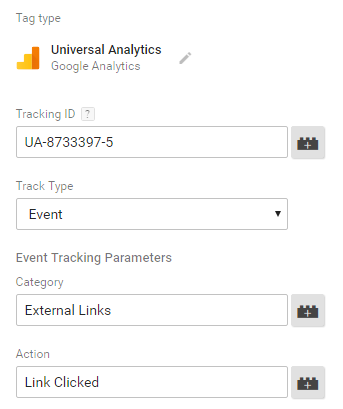
The label field identifies the event amongst other events within the same category and action. For a very simple site you could set this yourself or you can use one of the built in Tag Manager variables which will allow you to set the label to.
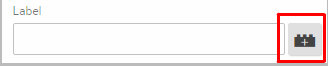
Next, we click on the 'lego brick' and you will get a list of available variables. By default Google Tag Manager has a lot of its built-in variables disabled but it's very easy to enable them, look for the text in the top right that says "BUILT-INS" and give it a click, this should reveal yet another pop out menu showing all the possible built-in variables.
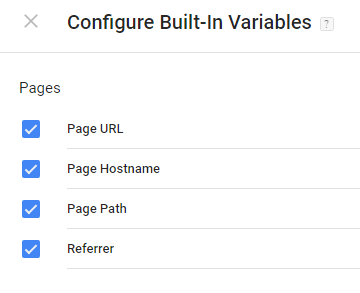
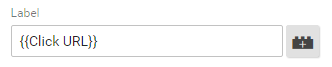
For this example we want to include a label that gives us more information about the url that was actually clicked, for this we need to tick the "click URL". Scroll down to the clicks section and tick the box next to click URL.

You can then go up one screen to the choose a variable list and select click URL in the text, or add "{{Click URL}}" directly into the label box.
The tag is now complete and ready to be used, but before we can start to record events in Analytics we need to set up when the tag gets triggered. Triggering is what decides when the tag is activated, this is where you can add conditions.
Scroll down below your tag configuration and click on the triggering section, another popout screen should show you a list of existing triggers. It's probably empty right now so we need to create a trigger before we can start to use our tag.
Click on the blue + button in the top right corner of the screen to create a new trigger.
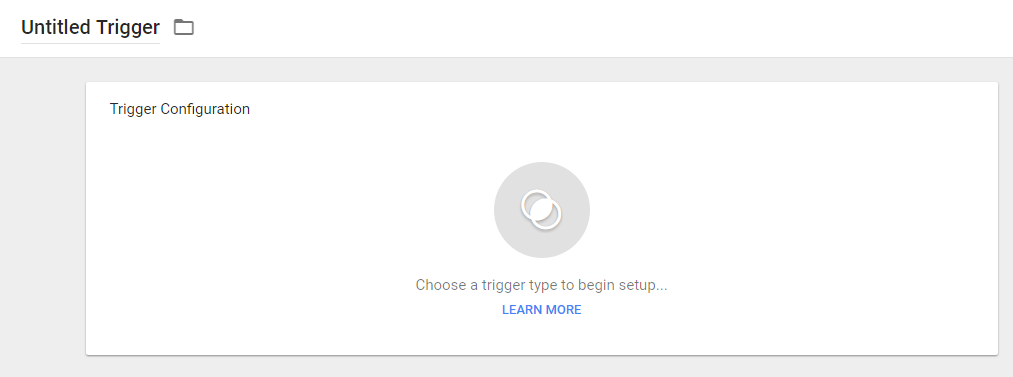
Start by naming the trigger something like "External Link Clicks" to indicate exactly what the trigger does when it fires.
Next click on the trigger configuration and select the trigger type of "Just Links" under the click section, this will set the trigger configuration to automatically look for clicks on links.
Currently this will fire on all links and record the URL clicked.
Whilst this would be useful we would overwhelm Analytics with events as people use our navigation to click through the site, so we need to filter this down to just some link clicks.
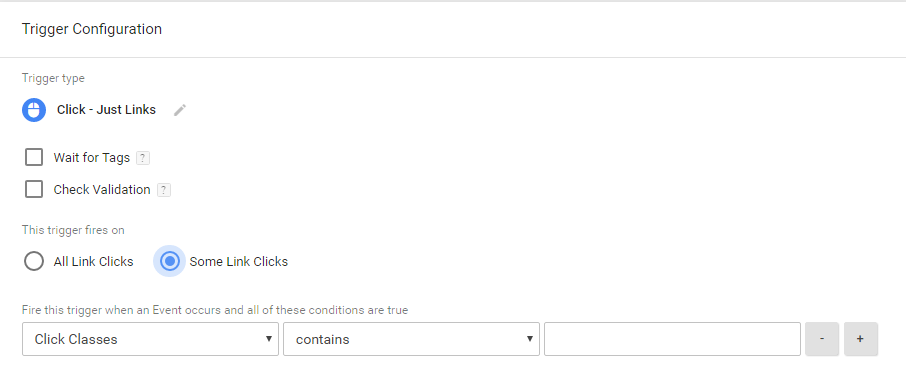
We want to avoid any link that points internally, so we want to ignore any Click URL that contains our website URL, enter your own website url into the box:

Click save in the top right and you will be taken back to your tag, save the tag by again clicking the save button in the top right and you will be taken back to the tag workspace screen, you should also see your brand new tag in the list.
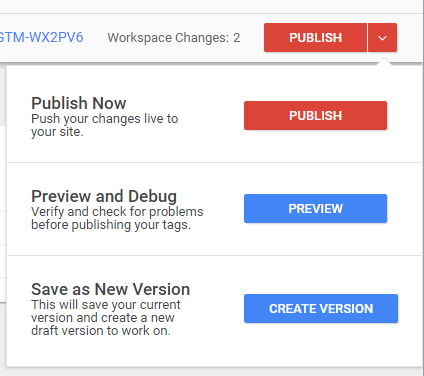
You could publish your tags right now but it's a good idea to check that everything is working as you intended. Tag Manager has a built in preview and debug tool which allows you to open your website and see exactly what is being run and recorded, to activate it go to the top right 'publish' button and click the small arrow to the right.
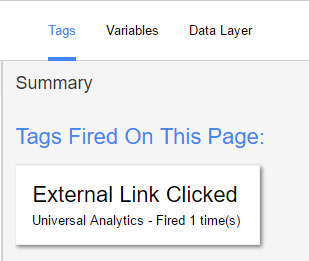
Click preview from this list and Tag Manager will launch the debugger, you will see a notice in Tag Manager letting you know that the workspace is in debugging mode - enter your website URL a new tab and you should see the tag manager screen at the bottom of your window.
To test your tag you need to click on an external link and see if the tag appears in the 'tags fired on this page'.
You also need to click on an internal link, such as your navigation, to make sure that the tag doesn't fire, we don't want to start tracking every single link click!
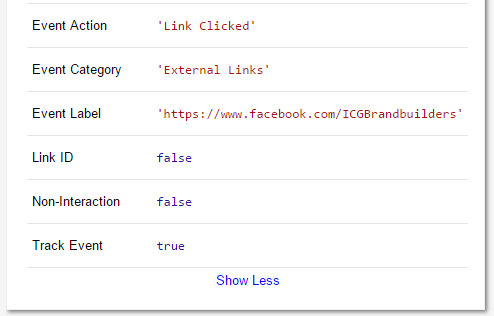
At this point you can see exactly what was recorded as part of the click by selecting the tag that was fired, External Link Clicked in the above example. This opens up another screen which gives more detail about the tag.
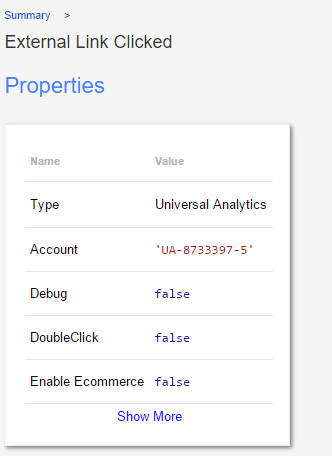
Click on show more and you will get all the details that were sent over to Analytics including your dynamic label tag.
If everything looks correct it's time to head back to Google Tag Manager and send it live - make sure to leave preview mode first otherwise every time you visit your site you will get a debug menu, then head to the top right of the screen and click publish.
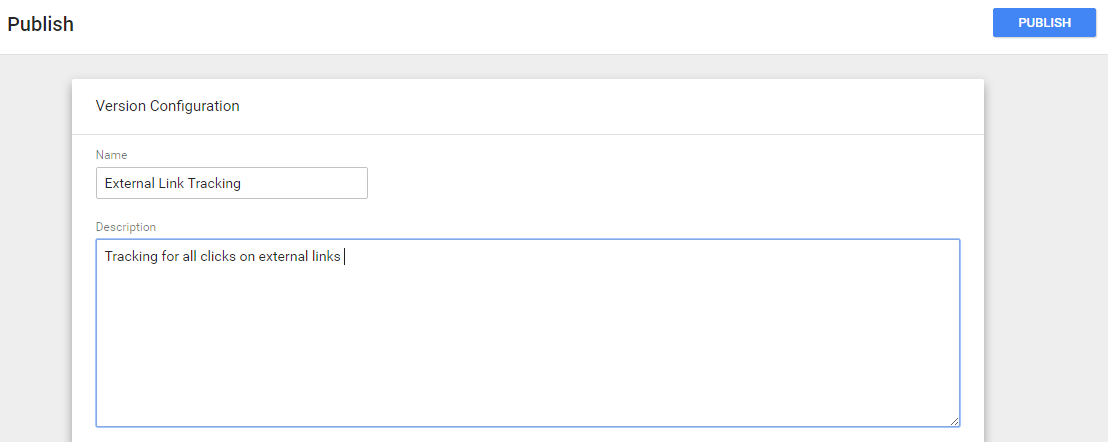
You will be given a summary screen of all changes and you will be able to name the version and give it a description.
And that's it, you should start to see events appearing in Analytics real time and be able to see what page people clicked on external links the most.
You can use the same ideas to set up tracking on from completions, email clicks, internal link clicks or even more complex events such as scrolling up and down a page. Get testing!
Contact us on 01772 679 383 or email Richard to find out more. Alternatively, visit our Digital Services web page. http://www.icgonline.co.uk/our-services/digital
If you have any questions, send them to us via Twitter using #digitalinsights @icgbrandbuilder
About the Author
Richard is an SEO/PPC specialist at ICG who deals with all things data. A self professed analytics geek, he spends most of his time digging through data to help clients understand what they need to know about their online audience.